How to apply foundation like a makeup artist for flawless results every time
Pros explain how to apply foundation step-by-step, with all the products you need

Emma North
Beautiful makeup starts with a great base, but do you know how to apply foundation like a pro?
Unfortunately, even the best foundation can end up looking a bit iffy if you haven't nailed how to apply it in the first place. As with learning how to apply concealer, a little know-how from the experts (whose job it is to ready celebrities' faces for the red carpet) plus some skin prep tips, will get you well on your way to complexion perfection.
Whether you feel you need lots of coverage or just a touch, knowing how to apply foundation can really transform your look. According to Aimee Connolly, makeup artist and owner of Sculpted By Aimee, "Foundation is great for evening out the skin tone and adding all over color and coverage to the skin." So if common concerns like rosacea, acne, or pigmentation are getting the better of you, there's no harm in covering these up with a great foundation.
How to apply foundation: step-by-step
Step 1: Choose the right formula
No amount of skill can make up for using the wrong base in the first place. Get to know foundation terminology and pick one of the best foundation formulas that encourage your skin's natural radiance. Allow us to translate:
- Luminous: glowy, sheeny, hydrated-looking skin
- Dewy: moisturized, slightly shiny skin; "glass skin"
- Sheer: translucent, radiance-enhancing formulas with minimal coverage
- Glowy: sheeny verging on shiny effect, good for those with nothing to hide
- Full coverage: more opaque, you will see fewer blemishes, but also less skin
- Medium coverage: allows the skin to show through, but blurs blemishes
- Matte: reduces shine, looks polished, but can be unflattering if applied too thickly
Step 2: Prep your skin
Learning how to apply foundation can enhance what you’ve got, but it’s no substitute for real radiance, so begin with a few skincare for makeup prep steps. "Your skin prep should be tailored to your skin type, it's not one routine suits all," explains Connolly. Aim for a smooth, hydrated canvas to work from and allow your foundation to sit better on the skin. As a rule of thumb:
- Cleanse: Dislodge old, dead skin cells that can build up and subdue radiance. Lather up with lukewarm water and a nourishing oil or balm, then remove with a washcloth for extra smoothness.
- Smooth: Follow up with a gentle acid toner, which loosens the joins between dead cells so they’re easier to budge. You skin will be smoother with a radiance that shines through any base.
- Hydrate: Once your skin is clean and flake-free, a good quenching moisturizer will ensure any patches of dehydrated skin won't drink your foundation or cause it to flake.
Our beauty editor recommends...
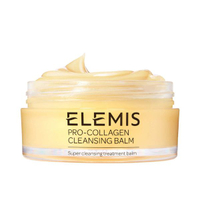
Elemis Pro-Collagen Cleansing Balm | RRP: $66/£46
Take a dollop of this balm and gently rub it on to damp skin before rinsing. It blitzes old makeup and residue for clean, fresh skin that's primed and ready for makeup.
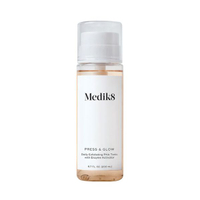
Medik8 Press & Glow Daily Exfoliating PHA Tonic | RRP: $35/£27
We rate this product not only for its gentle resurfacing formula but also for its glow-getting antioxidant ingredients. It's suitable for everyday use and won't cause irritation or redness.
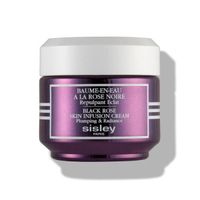
Sisley Black Rose Skin Infusion Cream | RRP: $202/£155
It might be eye-wateringly expensive but this luxury face cream is much loved for one very good reason - it simply makes your skin look and feel gorgeous. Think of it as a skincare splurge rather than a staple.
Step 3: Use a primer
Think of your skin as a wall that needs a fresh paint job - you wouldn't just paint the wall straight away. It needs cleaning and priming first to get the best possible finish and longevity. "Primer will extend the longevity of your makeup and keep it from wearing off," agrees Connolly.
Sign up to our free daily email for the latest royal and entertainment news, interesting opinion, expert advice on styling and beauty trends, and no-nonsense guides to the health and wellness questions you want answered.
The best primers grab hold of your foundation and give skin a smooth, blurred quality that’s as natural-looking as it is naturally impossible to achieve. "Choose a primer to target what your skin needs, such as oil control, hydration or to reduce pore size," says Connolly. "For an all-over glow, use a radiant primer straight after moisturizer, applying right across the face to enhance the skin," says makeup artist Tania Greer. "Alternatively, using your fingers, apply to specific areas: bridge of the nose, cheekbones, middle of the chin, above the brow, and on the Cupid's bow."
Our beauty editor recommends...
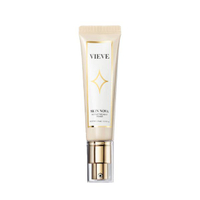
Vieve Skin Nova Instant Radiance Primer | RRP: $37/£27
For dry skin lacking in glow, give this a try. It's full of skin-loving ingredients like rose water and niacinamide to improve your skin's natural luminosity and instantly perks up a dull complexion.
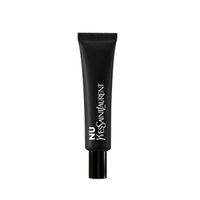
Yves Saint Laurent Nu Blotting Lotion | RRP: $34/£27
Lightweight, non-sticky, and mattifying, this is a must-have for oily T-Zones that start to look like an oil slick by lunchtime. It minimizes the look of pores and helps your base stay on all day from breakfast to dinner.
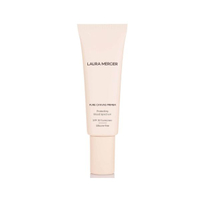
Laura Mercier Pure Canvas Protecting Primer | RRP: $42/£34
This primer contains an SPF of 30 to keep skin protected and we really rate its smooth, weightless formula. If you're in direct sunlight, make sure you're using one of the best facial sunscreens too.
Step 4. Grab a brush
Blenders and fingers have their merits when working with lighter formulas. How to apply tinted moisturizer is all in the handiwork, and if you're weighing up foundation vs BB cream, it's worth noting that BBs are often best applied with a dampened beauty sponge. But most experts agree that a brush is best when it comes to learning how to apply foundation for a smooth finish.
The type of brush you use depends on the finish you want, explains MAC Senior Artist Dominic Skinner. "A duo-fiber brush will whip the foundation onto the skin lightly and evenly, so it's ideal for glow." He says, "Whereas a flat synthetic brush will lay the foundation on the skin with a fuller finish, and will suit if you have oilier skin or need more coverage. You can use fingers to apply foundation if you prefer, but always go over with a brush to finish off and add finesse."
Our beauty editor recommends...
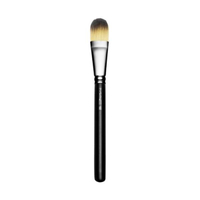
MAC Cosmetics 190 Foundation Brush | RRP: $39/£28
If you're after a little more coverage, try this flat brush. Its domed shape is ideal for getting into areas like eye sockets and around the nose. Treat your face like a canvas and apply your foundation in layers so you don't end up with too much product.
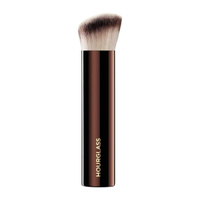
Hourglass Vanish Seamless Finish Foundation Brush | RRP: $47/£45
Achieve a lighter base with this fluffier foundation brush. It gently buffs product onto the skin but won't leave you feeling caked in the stuff. It's one of our favorites for a seamless finish.
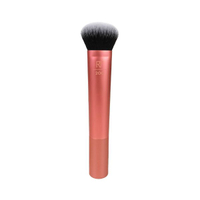
Real Techniques Expert Face Brush | RRP: $12.10/£8.99
Multi-tasking brushes like this one from Real Techniques can speed up your makeup application as you can use it for foundation, cream bronzer, and blush. Its synthetic bristles are easy to wash and give seamless, natural-looking coverage.
Step 5: Work outwards and build
Once your skin is prepped to perfection, the last thing you want to do is smother your whole face in heavy pigment. "Apply foundation to the areas that need more coverage first and blend it out from there," says Connolly, "This helps prevent too much product build-up in areas you might not necessarily need it."
Generally speaking, the center of the face including the nose, sides of the nose, and forehead need the most coverage so start buffing there first. This allows for sheer coverage on the cheeks and jaw. Then use whatever's left on your brush and blend down the neck - this stops the dreaded tidemark and ensures a seamless finish.
Building up slowly is key. "Some common mistakes I see women making with foundation is applying far too much product," says Val Garland, L’Oréal Paris Global Makeup Artist. "To achieve a healthy skin look, start with a thin layer and only apply to areas that need coverage." When you've buffed in your first layer of foundation, take a good look in natural light before applying any more; you want as much skin as possible to show through for a natural, radiant look.
Step 6: Check and set
It's up to you how you finish. If you have oily skin, a dusting of loose powder can help set your foundation in place. "Powder will naturally help to reduce and control oil and shine," explains Connolly. Some people like to use setting sprays for extra hold and if you have dry skin, you may want to add extra glow.
"A great trick is after you have finished your makeup, add a little bit of your best face moisturizer on the palms of your hands and gently press onto the high points of your cheekbones," says Garland. "This is my secret to achieve a hyperreal glossy skin finish, and help your makeup appear natural."
For even more glow, consider finishing with highlighter. If you’ve tried these before and ended up looking more C-3PO than J-Lo, don’t blame yourself. They’re often billed as all-over glow boosters, when in reality they look far better as an eye-catching dab here and there, creating a flattering flash where light naturally hits. Cream is generally more flattering than powder, as are champagne, peach, and rose gold shades compared to silver, which can look grayish in the wrong light.
Our beauty editor recommends...
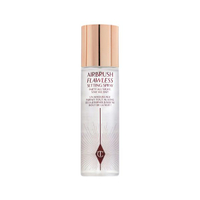
Charlotte Tilbury Airbrush Flawless Setting Spray | RRP: $35/£26
Useful for priming and setting your makeup, this oil-free mist will keep your base looking flawless. It contains aloe vera and green tea to help keep the skin calm. To use, hold it 30cm away from your face and get spritzing!
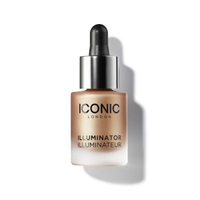
Iconic London Illuminator | RRP: $32/£32
A liquid highlight, like this one, creates a dewy glow on the skin that looks incredible. We rate this one for its longevity. Just a few dabs on the cheekbones will last all night and enhance your radiance tenfold.
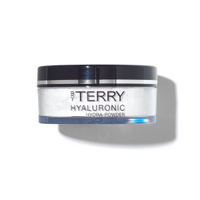
By Terry Hyaluronic Hydra Powder | RRP: $55/£42
We love this non-chalky setting powder. It takes the unwanted shine out of the skin but still lets a little natural luminosity through. Its finely-milled, transparent formula is great for all skin tones and doesn't leave a white cast.

As woman&home's Beauty Channel Editor, Fiona Mckim loves to share her 15+ years of industry intel on womanandhome.com and Instagram (@fionamckim if you like hair experiments and cute shih-tzus). After interning at ELLE, Fiona joined woman&home as Assistant Beauty Editor in 2013 under industry legend Jo GB, who taught her to understand ingredients and take a cynical approach to marketing claims. She has since covered every corner of the industry, interviewing dermatologists and celebrities from Davina McCall to Dame Joan Collins, reporting backstage at London Fashion Week and judging the w&h Beauty Awards.
