How to nail 90s blowout hair in 5 simple steps
90s blowout hair is back! Our expert tips make it easy to achieve a supermodel-style blow dry at home


Grab your mousse and leave your straighteners at home, it’s time to relive your teenage hair fantasies with 90s blowout hair.
It’s no secret that the 90s are back in a big way. We’ve seen the return of lip liner and spidery lashes, and are desperately resisting the skinny brow revival. But a bouncy blow dry with the best hair dryer? That we can get on board with. “We are seeing a resurgence of the original supermodels and with that comes inspiration,” says pro hairdresser and founder of ARKIVE Headcare Adam Reed. “The 90s blow dry is based on supermodels like Cindy Crawford, Claudia Schiffer, and Helena Christensen. For that 90s blowout, you want the hair to bounce as you walk. It shouldn’t look curly, it should look textural. This is about the volume and mass of the hair.”
Before you start recreating a 90s blowout at home, you need to consider your haircut. This is easier to achieve on medium haircuts but can still apply to long hairstyles and short hairstyles too. “This style works best with a layered haircut similar to the iconic Rachel,” says pro hairdresser and ghd ambassador Patrick Wilson. “Like Goldilocks, it’s important that hair is not too short and not too long, otherwise it won’t hold through the day.”
How to achieve salon-worthy 90s blowout hair at home
Step 1: Prep the hair
Having the right hair styling products in your kit will make creating 90s blowout hair and mastering how to make your blowout last longer so much easier. And, what better to use than the hair product that defined the 90s? “You’ve got to prep the hair first with a mousse throughout the roots,” says Wilson. Before you recoil, let us assure you that mousse isn’t what it used to be. It will no longer leave your hair crunchy and strangely sticky, but add volume and grip to hair that’s searching for some supermodel-worthy oomph.
“When you’re applying product to the hair, use an oil first, then a primer or a blow-dry spray, and then a mousse,” advises Reed. “Apply the mousse into your hand and then lift the hair with your hands, section by section. Comb it from root to tip so you’re saturating the hair with product and getting hold all the way through.”
Our beauty editor recommends...

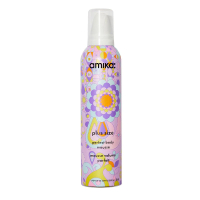
Amika Plus Size Volume & Body Mousse | RRP: $30 / £26
This mousse plumps even the flattest, finest of hair for long-lasting hold. It protects against heat and frizz too.

Hershesons Zhoosh Foam | RRP: $16 / £14
Not quite a mousse, but a great way to add texture and lift to your hair. Rub into dry hair to revive your 90s blowout hair between washes.
Step 2: Dry hair a little
Styling hair when it’s still sopping wet will not only be trickier than starting with damp hair but also increases the chance of damaging your strands too. “Towel dry the hair, then ring it out to squeeze as much water as you can,” suggests Reed. By removing the moisture in this way, rather than rubbing it with a towel, you’ll create less friction, and therefore less frizz, too. “This look is beautifully polished so no rough-drying first, as this can create major fly-aways,” adds Reed. Air-drying hair can lead to frizz too. Simply towel dry, and move on to styling with the hairdryer.
Sign up to our free daily email for the latest royal and entertainment news, interesting opinion, expert advice on styling and beauty trends, and no-nonsense guides to the health and wellness questions you want answered.
Step 3: Use brushes to style
Work section by section in the hair, using a brush to add volume and movement as you go. “Blow dry the hair around a round brush, wind it down to the root, and leave it there to cool down,” advises Reed. “The cooldown is really key, as it maintains shine and volume.” As you need that waiting time, it’s a good idea to invest in more than one styling brush. If you only have one on the go, you’ll need to keep pausing while each section sets – making for a much longer and more laborious process.
Once the hair has cooled, unwind the brush carefully. “You can put hairspray at the root as you’re taking it out to really get that volume in the hair,” adds Reed. Or, if you really can't get the hang of round brushes you could try using one of the best hair dryer brushes instead, using heat followed by a cold shot.
Our beauty editor recommends...

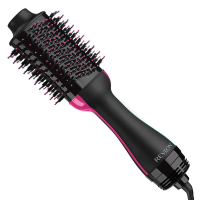
Revlon One-Step Hair Dryer and Volumizer | RRP: $59.99 / £62.99
This cult tool has won countless fans for its simple, user-friendly controls and ability to give supermodel-style bounce, kicks, and flicks to the hair with ease.
Step 4: Or cheat with tongs
Not everyone has the knack for using a hairdryer and a brush in tandem. Or, even if you can master it on one side, you might find you’re all fingers and thumbs on the other. If this sounds like you, you can cheat your way to 90s blowout hair with your best curling iron instead.
After blow-drying the hair upside down, grab your curling tool. “Section your hair into three. Starting at the bottom of the head, take the tong and wrap pieces of hair around the barrel. Pin these sections as you go," advises Wilson. "Continue this into the middle section and then finally the top section. What you’re aiming for is a head full of barrel curls, similar to a roller set. Let this cool for at least 10 minutes before taking the pins out. The longer you leave the pins in, the longer the style will last.”
Step 5: Set in place
Whichever method you’re using, you’ll need to brush out the heated sections and mist them with hairspray to set them in place. “When you brush out your curls spray your brush with hairspray instead of spraying directly onto the hair,” says Reed. “You can also use your fingers,” suggests Ryan Wilkes, hair stylist at Hershesons. “This will help hold the volume and shape.”
Our beauty editor recommends...

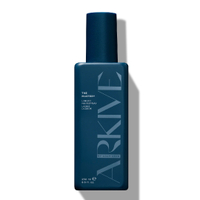
Arkive The Mastery Hairspray RRP: $16/ £13
This light and non-sticky spray not only offers hold for your style but also gives it a bit of texture. We love the eco-friendly non aerosol bottle too.
Jess Beech is an experienced fashion and beauty editor, with more than eight years experience in the publishing industry. She has written for woman&home, GoodtoKnow, Now, Woman, Woman’s Weekly, Woman’s Own and Chat, and is a former Deputy Fashion & Beauty Editor at Future PLC. A beauty obsessive, Jess has tried everything from cryotherapy to chemical peels (minus the Samantha in Sex and The City-worthy redness) and interviewed experts including Jo Malone and Trinny Woodall.
